How to manually configure
ASUS DDNS service without AiDisk
This page will guide you through the steps of setting up
ASUS DDNS Service without AiDisk.
0. Initial Setup
Power ON your ASUS router, wire-connect your computer to it with a Ethernet cable.
From your computer, use a browser to access the main page of your ASUS router.
It should be available at http://192.168.1.1 by default, you should see the main page as in Fig.1
When prompted to login, try 'admin' for both username and password.
1. Network Map
The main page shows a map of your network environment, including:
(1a). Your ADSL or Cable MODEM (usually leased from your ISP).
(1b). Your ASUS router (WL-520GU in this example).
(1c). Clients connected to the router (click on it will get a list of IP addresses).
(1d). USB devices connected directly to the router's USB port.Fig.1
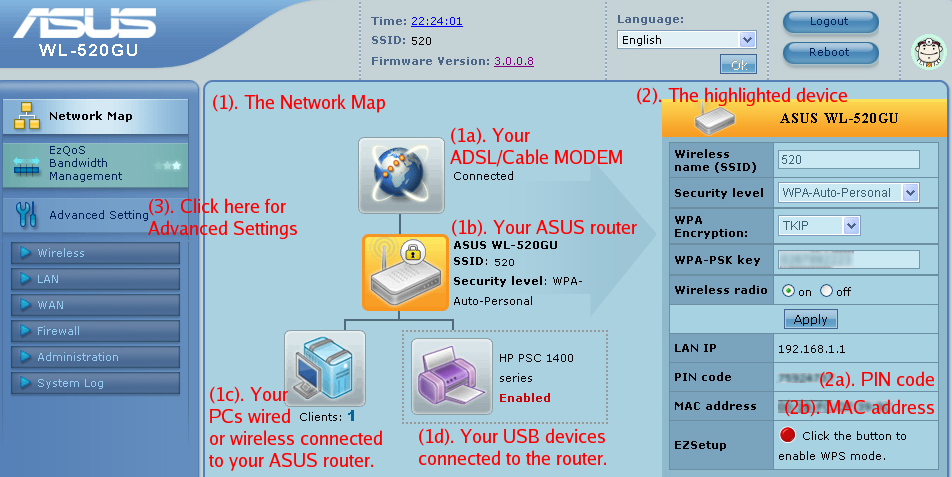
2. Device Information
If you click any device on the 'Network Map', its information will be displayed on the right hand side.
Click on your ASUS Router to see the following important information (see in Fig.1):
(2a). PIN code (provided by factory),
(2b). MAC address (physical network address of the router).
You'll need the above information when calling ASUS customer service for support.
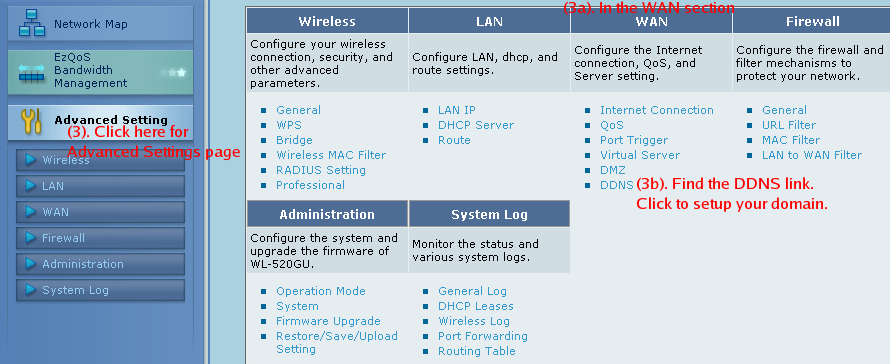
3. Advanced Settings
To setup your hostname, click 'Advanced Setting' on the left (see Fig.2)
(3a). Find the 'WAN' section on the right.
(3b). Click the 'DDNS' link under 'WAN' section to get into DDNS settings page.Fig.2
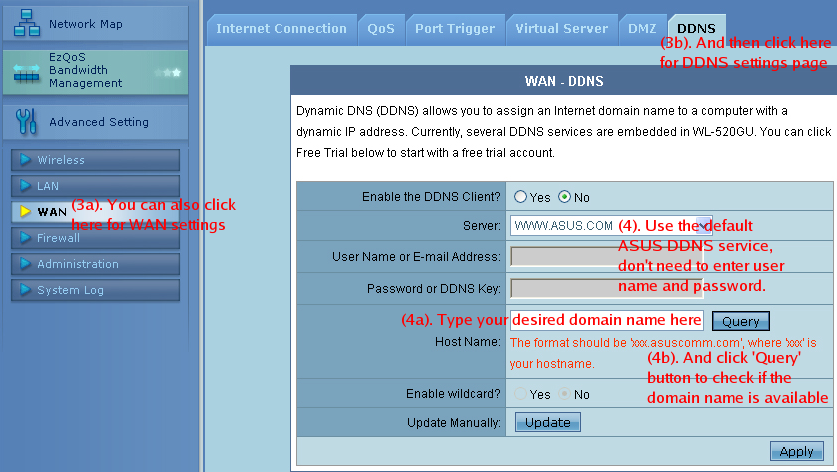
4. DDNS Settings
In DDNS settings page, ASUS DDNS service (shown as WWW.ASUS.COM) is selected by default.
(4a). Enter your desired hostname to the 'Host Name' edit box.
The edit box expects fully qualified domain name, so please append ".asuscomm.com" to it.
E.g. enter "jack.asuscomm.com"
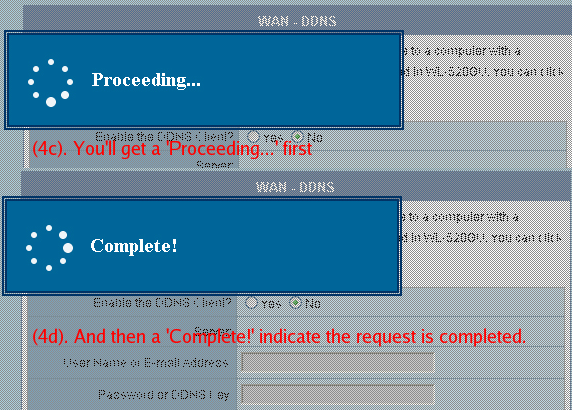
(4b). Click 'Query' button, the router will send a request to server.Fig.3
(4c). A box will popup indicating the progress of communication.
(4d). The box will dismiss when communication ends, and result will be displayed in another message box.Fig.4
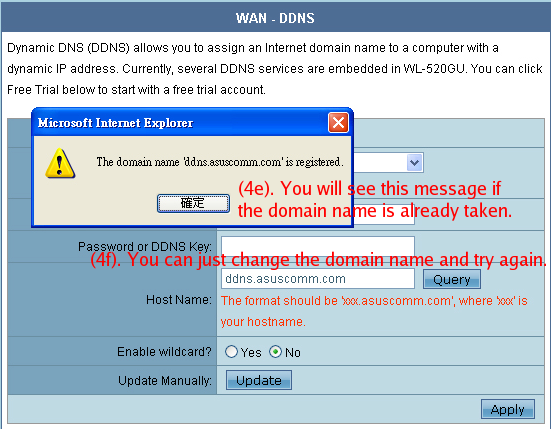
(4e). If messages goes like 'jack.asuscomm.com is registered',
it means someone else has already registered the hostname.
(4f). You can just try again with another hostname in this case.Fig.5
(4g). Try other hostnames until you get a 'Registration is successful.' message,
then you can start accessing your router with the registered hostname.
(It's not necessary to click the 'Apply' button here)Fig.6
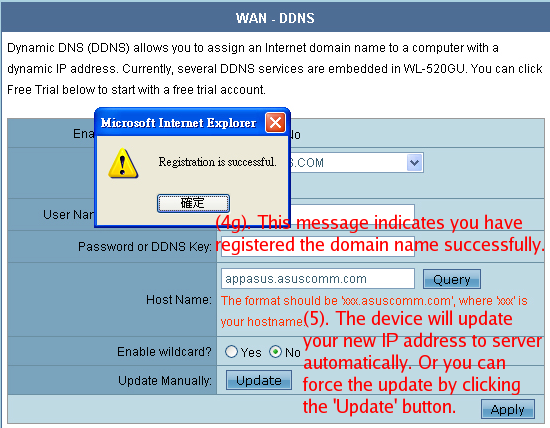
5. Automatic Update
Once successfully registered, the device will automatically update your IP address to the server on re-boot,
or when it gets a new IP on re-dial after connection lost.